| ||||||||||||||||||||||||||||||||||||||
| ||||||||||||||||||||||||||||||||||||||
Jaguar MK2 Reveneering Project.Introduction.First let me start by saying that reveneering the woodwork in my MK2 has been a very rewarding and time consuming project. It is possible to do the job with only a few hand tools, buckets of patience and a lot of time. I firmly believe that with the right approach any one can do a fantastic job, but remember (as with all resoration) patience is key.
Getting Started.If you are considering a reveenering project your woodwork must be in pretty poor shape. If you can get away with simply replacing the odd bit of missing veneer try to do this before you decide to do a full reveneer. There are many suppliers of burl walnut veneer, but keep in mind that it is a natural product and getting an exact grain match is often difficult.My woodwork had spent several years exposed to the elements and had basically fallen apart completely. The Dash cap was in two pieces and the plywood on the facia had mostly delaminated. So I started by making new pieces out of plywood. The solid wood parts were sound. I wasn't able to take pictures of the dash in the car (as it was a basket case when I got it) and some of the brackets were missing, but take lots of picture so you know how things should look.
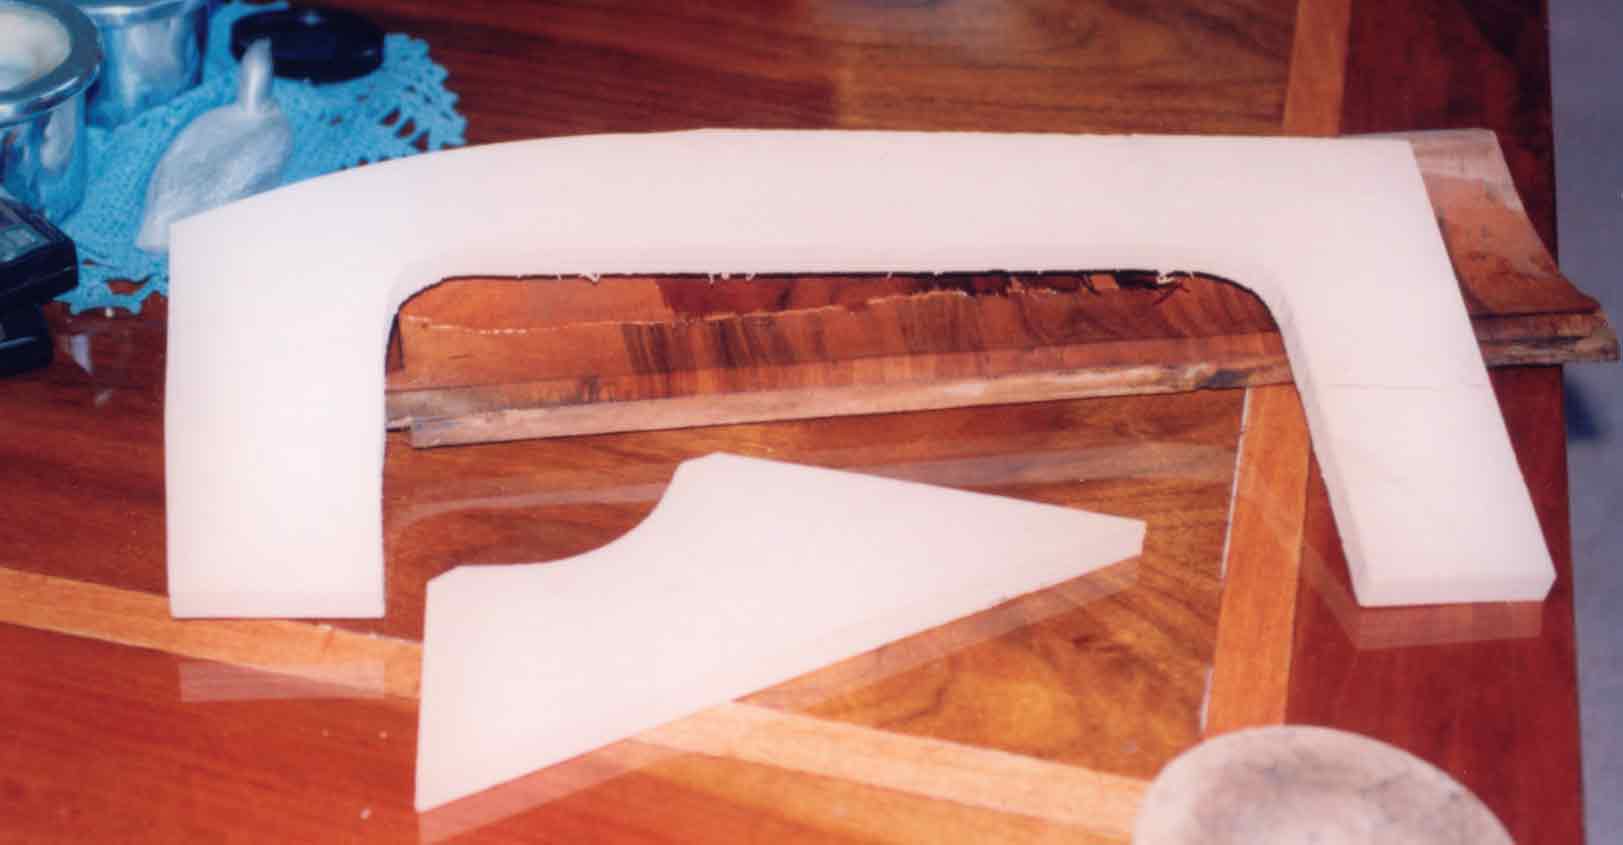
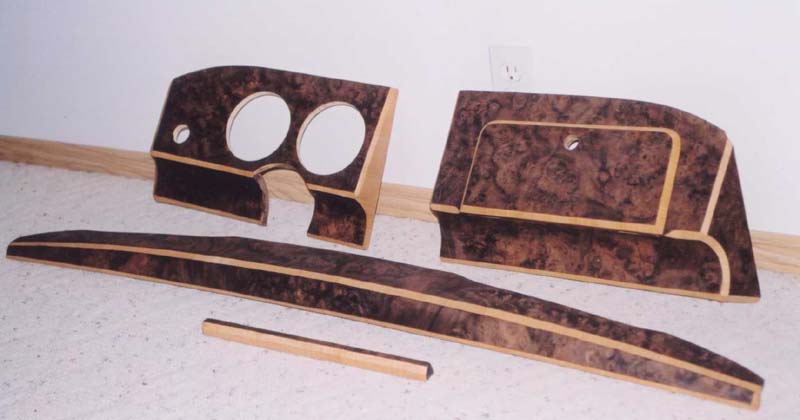
Making New Parts.I was able to salvage the old bits of plywood and use them to make patterns. For the main part of the facia (gauge and glovebox sides), I attaced the old parts to a sheet of marine grade baltic birch plywood (1/2 inch). Then using a pattern bit in my router I made exact replica's of the parts. Use a router table for this step, it makes things easier. This ensures that the gauges and everything is approximately the right size and in the correct location. Then you have to figure out the correct angles (use a bevel gauge and a chop saw for this operation), and start the assembly. Here are the glovebox side parts ready for assembly.
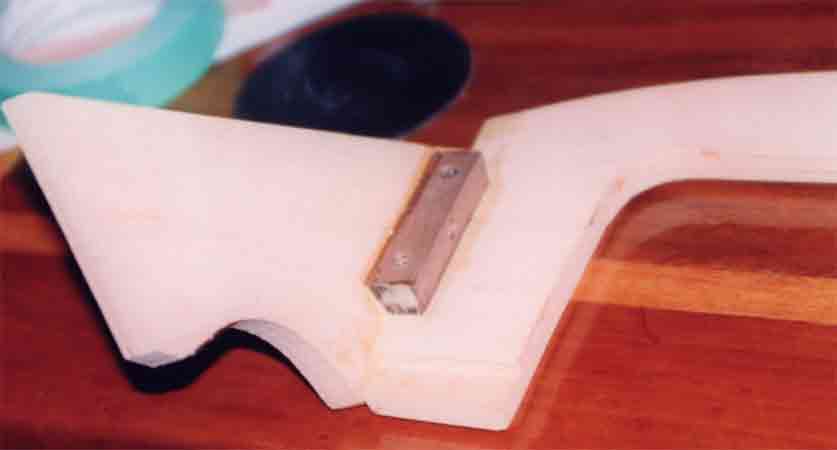
Don't forget to reinforce the sides. Also note the rabbet cut in the facia to accept the solid wood part.
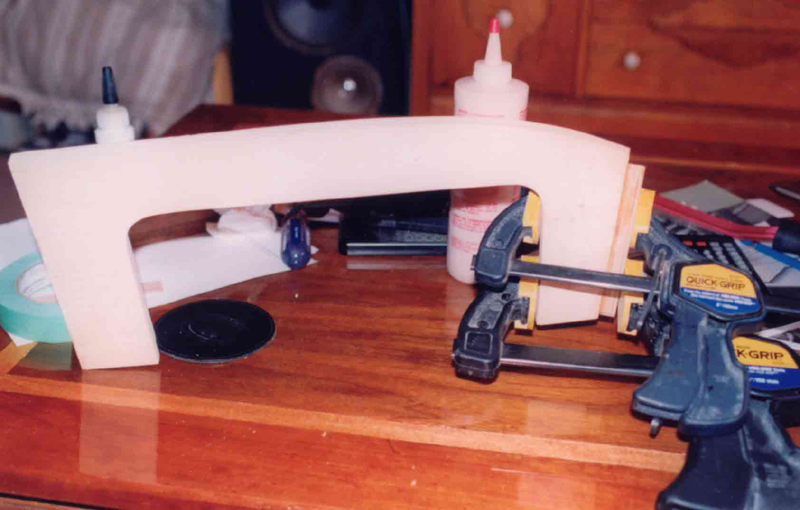
For glueing, I used a waterproof polyurethane glue on all parts.
Here's the glovebox finished.
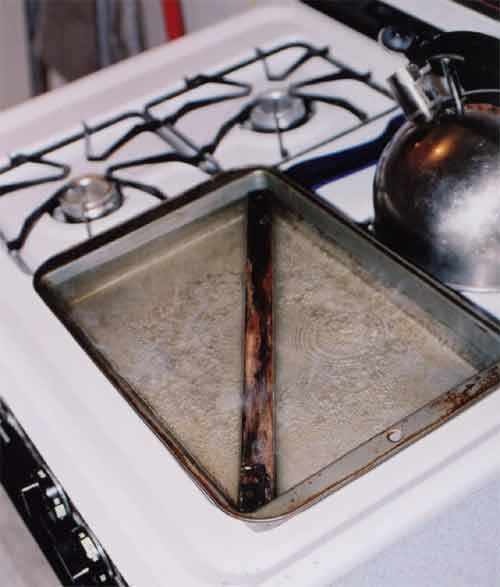
Veneer Removal.If your wooden parts are in relatively good shape, the next trick will be removing all of the old veneer. The path taken here will depend on the condition of your wood. If you have had to build parts and reglue significant structures then all of the veneer has to come off and be replaced. You should remove the veneer before you reglue parts. In some cases the veneer will peel off with a sharp utility knife blade. This process can be helped if the parts are soaked in hot water (boiling is best), as the water softens the original glue. Only use this technique on the solid wood parts Here's a shot of one part being boiled on the stove.
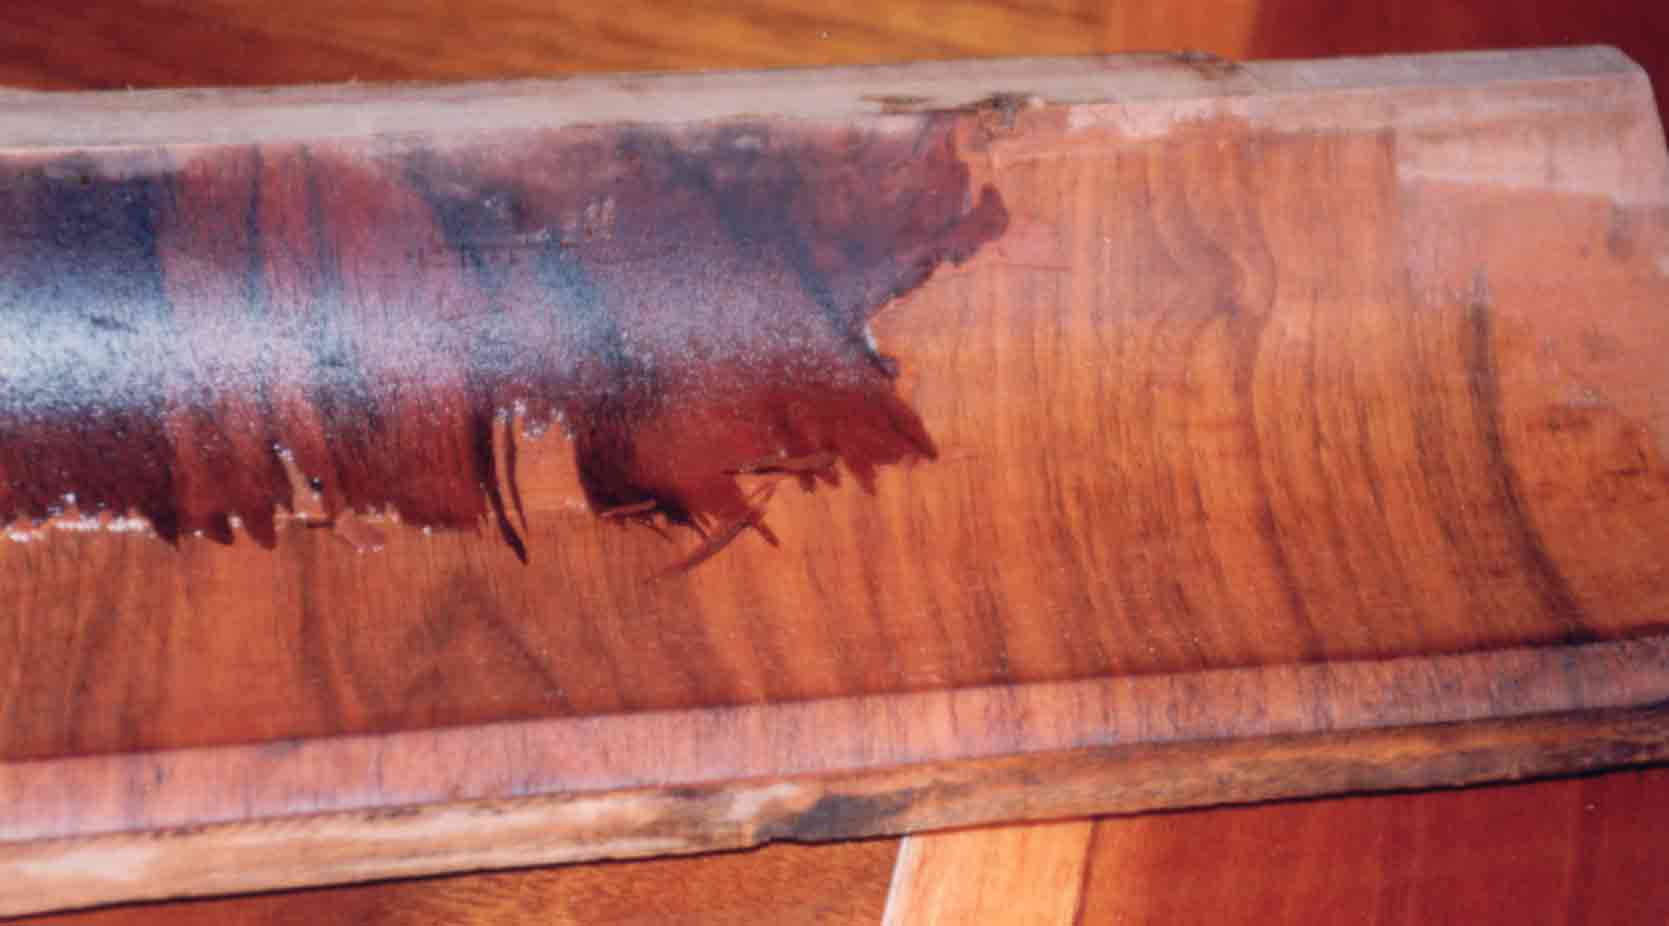
Carefully separate the veneer (resoak if necessary). I used my bathtub for the dash cap. As you get the top layers of veneer off, you'll be able to see how the dash was veneered.
In this image you can see that there are in fact three layers of veneer over this part. First the edge veneer (that covers the entire part) then the burl which is mounted to a backer veneer and was actually held in place with very fine veneer nails). Although I didn't use this exact technique when I did the reveneer, it is useful to see how the factory dealt with problems like the veneering the curves. If you mount the burl to a backer first, it is less likely to cause problems when mounted to a concave surface.
Veneering Techniques.Here are a list of the different ways I have done veneering in the past.
1. The traditional approach, but using PVA glue (regular carpenter's glue).
2. Vacuum veneering. I ran some experiments with a vacuum pump and this worked like a charm...but maintainig the pressure (I have a hand pump) at 25 atmospheres was hard, and not suitable for removing the large volume of air. If you have access to a vacuum pump this is the way to go. A bag can be constructed from any heavy vinyl...the problem is getting it to seal. There are plenty of web sites that outline this technique. 3. Ironing the veneer. This is the method I have used so far. I expect this will create some controversy. Essentially what you do is cover both surfaces with PVA glue (I used Tightbond 2)and let it almost dry. Experiment first as the drying times for the veneer versus the substrate will be different. You must apply the veneer BEFORE the glue is completely set. As it dries it becomes dry to the touch, but still flexible. When it has reached this point, you iron it on using an iron on a medium-high setting (depends on the iron, again experiment). I use a small roller to put the glue on as getting an even coat of glue is critical. What happens is the heat reactivates the glue and it attaches. The benifits are, if done correctly, the glue bond is just as strong. Again, I tested it by veneering some scrap using straight glue and clamps, then the iron-on technique and there was no difference in the bond...both had to be planed off. The wetted veneer is allowed to "move" freely as it expands, so buckling was not a problem, even for the burl walnut. I used this technique to attach the edge veneer and the face veneer on the facia panels. When you are ironing make sure to press down on the veneer until it is cool (it gets a little hot, but won't burn you...iron temperature shouldn't be set that high). The technique is very fast, and what you see is what you get. I have pieces I have veneered using this technique and there isn't any problem after a couple of years. If you use the clamping procedure and have a few wrinkles...Iron them out. I always have a peek at the glue up after a half an hour and see how things are going. If everything is perfect...I clamp it back down and leave it for a couple of hours. If the veneer is a little wrinkled (this happened on the edge of the venner on the concave part of the facia) then turn on the iron and flatten the edge. Works like a charm.
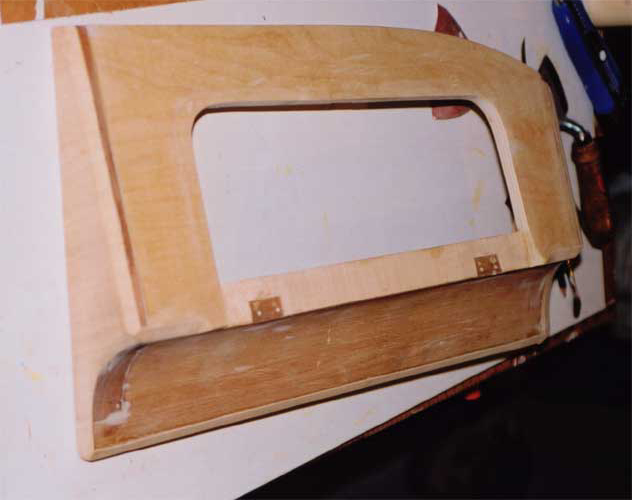
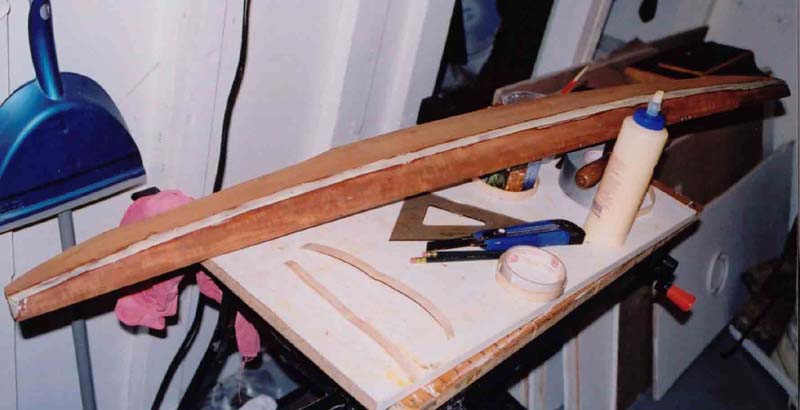
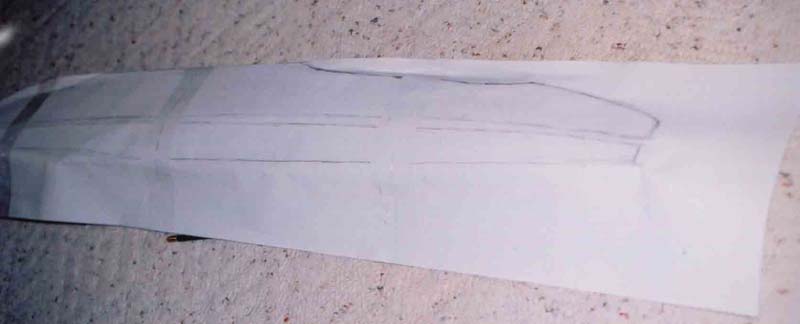
Veneering.Make patterns of your dash after you get the edging on (I included a photo of the dash cap with the glue drying before I applied the edging and after).
Always make the edging veneer wider than is required. This way the veneer will not be too small.
Making Patterns.With all of the edging ironed on and trimed, make paper patterns of all of the parts so you can accurately cut the burl. Always cut the veneer only a little wider than you need (see the untrimed photo, I had trimed a small section of the veneer). This gives you some wiggle room.
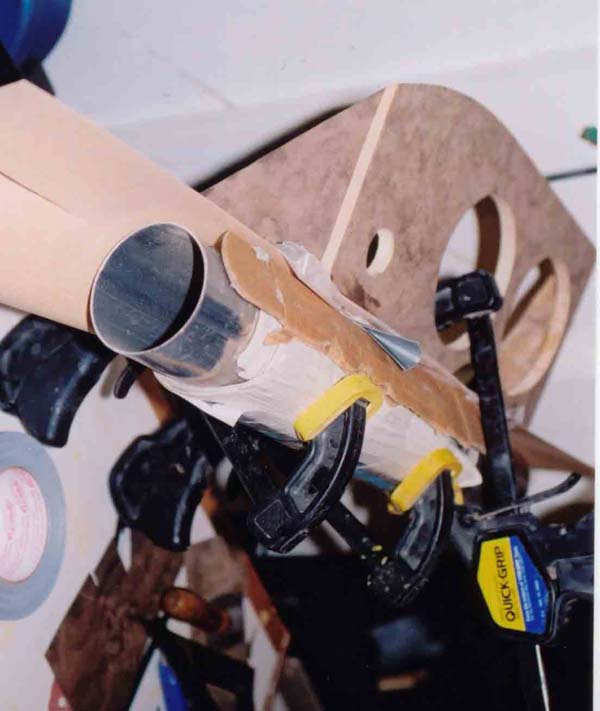
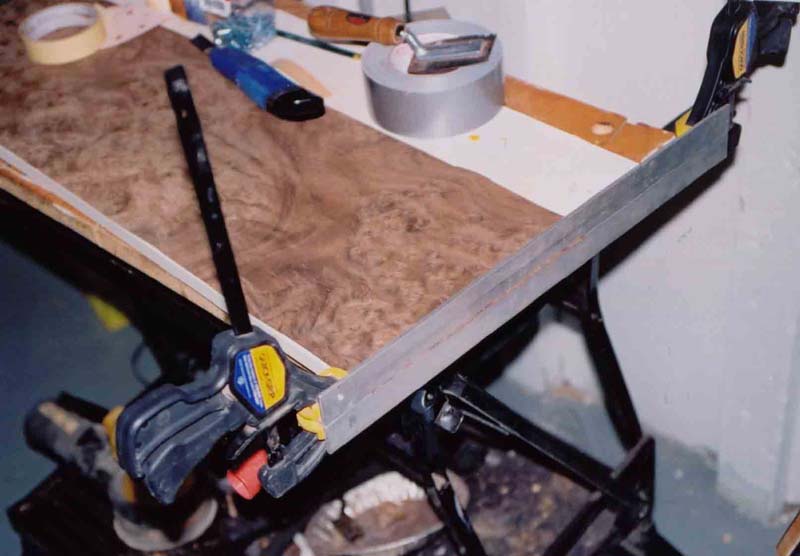
Gluing and Finishing.The veneer on the MK2 is bookmatched for the entire car. For the facia, I selected the parts of the veneer that I thought looked the best, then marked the veneer to ensure a bookmatch (start with the veneer in a stack, then "open" or turn over one sheet as you would a book.). The dash cap requires the veneer to be placed side-by-side. In order for this to look right, the join between veneers must be perfect. To ensure a tight fit I matched the veneer and established a straight edge between them. Once you have a straight line, clamp the two peices of veneer between some aluminum angle and sanded it flat (given the grain, sanding is safer).
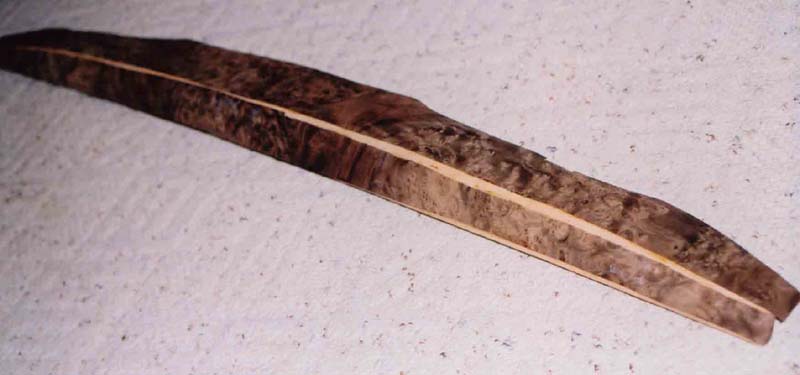
Then tape the veneer (I used masking tape, should have used veneer tape) together and cut out the pattern. You can use a veneer saw or a really sharp utility knife. If the veneer brakes, just tape it back together. Then glue both halves, wait, then iron it on. Once you've gotten that far it should look like this.
Then you have to trim the veneer. Again, use a very sharp utility knife to get it close, then sand to get it perfect.
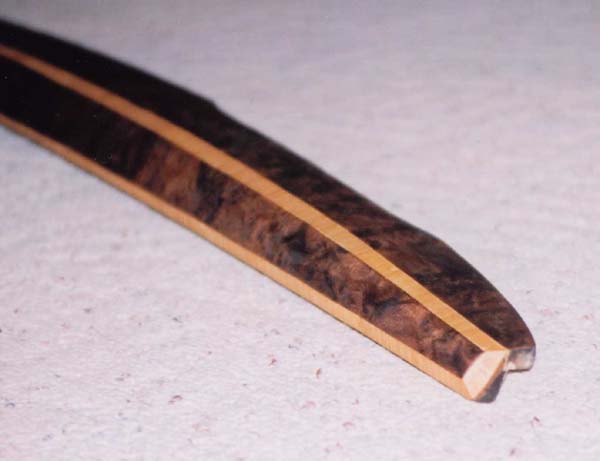
Then complete the same process on the other parts and you should get an excellent looking finished product.
For the gauge facia I simply glued on a complete section of veneer and then cut-out the gauge holes with a sharp knife. For the glovebox I had to make a pattern as the face of the door should match the facia. Same process as the dash. In fact, this is where I started the veneering project. Test your technique on the smaller parts first. I have since added the veneer on the back of the dash. I made a three-ply lamination (don't forget to alternate the grain direction of the veneer.) and nailed and glued it on as per original. Next is the finishing. I've been working on that for a couple of months, and still haven't finished it. I decided on a exterior polyurethane finish (oil-based) and have applied about 10 coats to date. Put on enough initial coats to fill the grain (lightly sanding between coats) then try to get about 4 coats of finish on top of that. Then set aside for a month to allow the finish to fully cure. The grain will show through again as the finish cures. Re-sand repeat the process. Patience is key. Have fun, and good luck.
Craig Coburn Back to Mk1 Mk2 page Last Updated 4 June 2003 |
|
| ||
 |
Improve your Jag-lovers experience with the Mozilla FireFox Browser!
©Jag-loversTM Ltd / JagWEBTM 1993 - 2024 All rights reserved. Jag-lovers is supported by JagWEBTM For Terms of Use and General Rules see our Disclaimer Use of the Jag-lovers logo or trademark name on sites other than Jag-lovers itself in a manner implying endorsement of commercial activities whatsoever is prohibited. Sections of this Web Site may publish members and visitors comments, opinion and photographs/images - Jag-lovers Ltd does not assume or have any responsibility or any liability for members comments or opinions, nor does it claim ownership or copyright of any material that belongs to the original poster including images. The word 'Jaguar' and the leaping cat device, whether used separately or in combination, are registered trademarks and are the property of Jaguar Cars, England. Some images may also be © Jaguar Cars. Mirroring or downloading of this site or the publication of material or any extracts therefrom in original or altered form from these pages onto other sites (including reproduction by any other Jaguar enthusiast sites) without express permission violates Jag-lovers Ltd copyright and is prohibited |
|