| ||||||||||||||||||||||||||||||||||||||
| ||||||||||||||||||||||||||||||||||||||
Jaguar XJ-SEarly Vs. Late Radiator Bleed
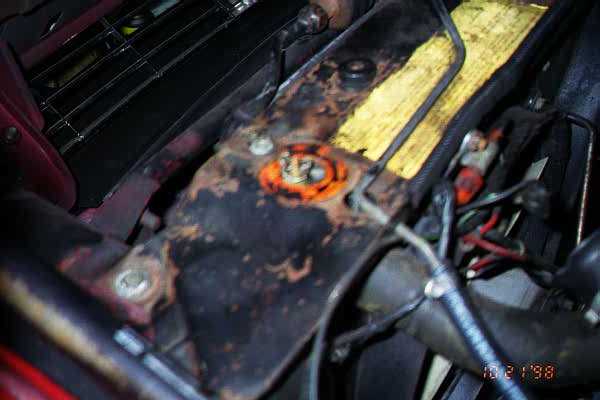
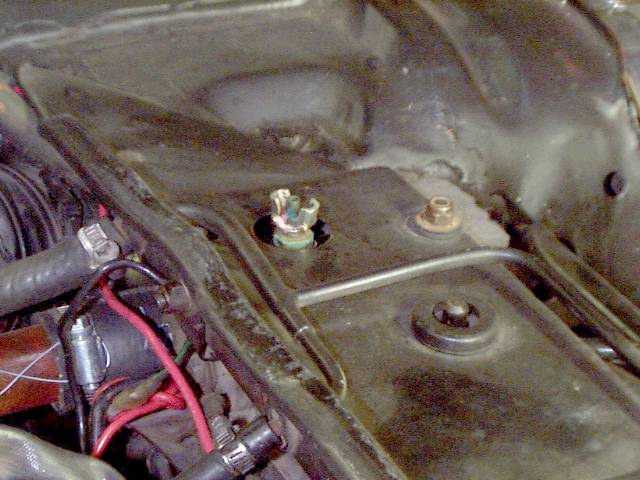
Sometime later, Jaguar replaced the bleed valve with a simple plug. When filling, the plug must be removed; once fluid starts to come out, the plug is reinstalled. Below is a picture of Kirby Palm's 1983 XJ-S.
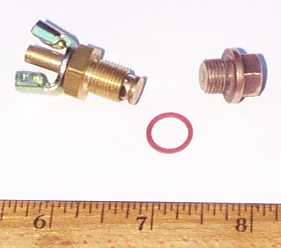
Note first off that the reason that hex head on the top of the plug is slotted is because Palm took a hacksaw to it; originally, only a socket will remove this plug. Ed Sowell also provided a valve, so here's what the plug and valve look like side by side. That plug is Palm's again; it's been carefully rotated so the slot doesn't show in this pic. Obviously, the valve is in the open position, so the valve seat and internal passages are visible.
Will the earlier valve fit on the later cars? Yes. Both are a 1/8" British Standard Pipe Parallel (BSPP) thread, which means you'd have a hard time finding anything else to fit (at least in the US). The only other question would be whether or not the valve will fit under the hood on the later cars (the radiator is different), but the bleed valve is still shorter than the banjo fitting on the opposite end of the radiator so it fits with room to spare. The valve is part number C45587. The ring is a suitable fiber seal, item #838050 from Lowe's. Using a fiber washer works pretty well with the solid plug as long as you don't overtighten it; it can be reused a few times, so you don't need a new one every time you are draining and refilling the system. On the other hand, if you're using the bleed valve, getting a solid copper seal such as Help! number 66272 may be better since you can tighten it down securely once and leave it. Of course, having it in hand, it ended up in Palm's car.
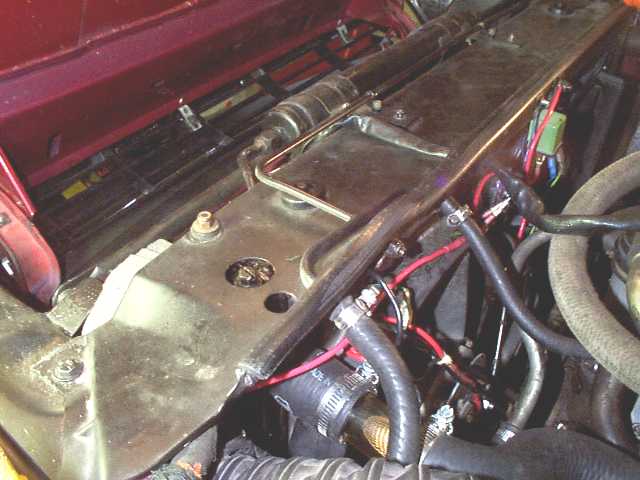
Also note that the bleed piping across the top of the radiator upper rail is different. The later system on Palm's car has a built-in ejector; high-pressure coolant from the engine side of the left thermostat comes through the smaller hose directly above the 11" fan, is squirted through a nozzle inside the T part of the tubing, and into the larger hose leading down to the header tank. Pressure in the header tank is kept low by another hose leading directly to water pump inlet, assuring a strong flow through this ejector. The flow through the T causes a suction on the other leg, which comes across the radiator upper rail from a fitting on the top right of the radiator and from a check valve just under the fill cap on the crossover pipe. Hence any air that accumulates at the top of the radiator or at the fill cap is drawn into this ejector and into the header tank, where it rises into the neck under that cap where it will be blown into the overflow tank behind the left front wheel well. During the next cooldown, the system will draw fluid back in from the overflow tank, keeping the header tank full. In the first picture of Palm's engine compartment, you can also make
out the 11" Mercedes fan Palm installed in place of the original Bosch
fan that blew up and the green relay (and sloppy-looking wiring) used to
control the 16" GM electric fan -- see ElecFan.html.
You can also see a Gano filter -- see GanoFilterCleanout.html.
You can even see some of the homemade brackets that hold the 1992-style
grille to the 1983 hood -- see 92Grille.html.
Finally, you can see the edge of the cold air intake hose -- see ColdAirIntake.html.
|
|
| ||
 |
Improve your Jag-lovers experience with the Mozilla FireFox Browser!
©Jag-loversTM Ltd / JagWEBTM 1993 - 2024 All rights reserved. Jag-lovers is supported by JagWEBTM For Terms of Use and General Rules see our Disclaimer Use of the Jag-lovers logo or trademark name on sites other than Jag-lovers itself in a manner implying endorsement of commercial activities whatsoever is prohibited. Sections of this Web Site may publish members and visitors comments, opinion and photographs/images - Jag-lovers Ltd does not assume or have any responsibility or any liability for members comments or opinions, nor does it claim ownership or copyright of any material that belongs to the original poster including images. The word 'Jaguar' and the leaping cat device, whether used separately or in combination, are registered trademarks and are the property of Jaguar Cars, England. Some images may also be © Jaguar Cars. Mirroring or downloading of this site or the publication of material or any extracts therefrom in original or altered form from these pages onto other sites (including reproduction by any other Jaguar enthusiast sites) without express permission violates Jag-lovers Ltd copyright and is prohibited |
|